
Samba Configuration

Ko Ko Ye
Founder
2 min read

Ubuntu 16.0.4 တွင် samba server installation and configuration ပြုလုပ်နည်းကို ပြောပြပေးသွားပါမည်။
Samba ဆိုသည်မှာ File Server တစ်မျိုးဖြစ်ပြီး Linux နှင့် တခြား OS တို့ကို ချိတ်ဆက်ပေးနိုင်မည်ဖြစ်ပါသည်။
ယခုအချိန်တွင် Samba Server version 4.4.4 အထိ ထွက်နေပါပြီ။
www.samba.org တွင် Offline Package အနေဖြင့်လည်း ဒေါင်းနိုင်ပါသည်။
ယခု samba server ကို မိမိစက်ထဲသို့ install လုပ်ကြပါမည်။
သင်သိပြီးဖြစ်သည့် terminal ခေါ်လိုက်ပါ။
Ctrl+Alt+T တွဲနှိပ်လျင် terminal ကို ရောက်ပါသည်။
install command က သိတဲ့အတိုင်း
sudo apt-get install samba
ရိုက်လိုက်လျင် သူ အလိုလို Download ဆွဲသွားမည်။
တကယ်၍ ဆက်ပြီးသွင်းမည်လား space ဒီလောက်ယူမယ်ပြောရင် yes နှိပ်လိုက်ပါ။
မိမိစက်ထဲမှာ samba ထည့်သွင်းပြီးပါက မည့်သည့်နေရာတွင် ရှိသည်ကို
whereis samba ဟု ရိုက်ပြီး ကြည့်နိုင်ပါသည်။
ဘယ်နေရာတွင် install ပြုလုပ်ထားသလဲဆိုတာ ပြသပေးပါလိမ့်မည်။
samba version သိလိုလျှင် samba --version ဟု ရိုက်ပါ။
ဒီအပိုင်းကတော့ samba server ကို ပြင်ကြပါမည်။ smb.conf ဖိုင်ကို ပြင်ဆင်ရပါမည်။
ဖိုင်လမ်းကြောင်းအတိအကျဆိုရသော် /etc/samba/smb.conf ဖြစ်ပါသည်။ မပြင်ခင် backup ယူထားသင့်ပါသည်။
ပြီးလျှင် nano ဖြစ်စေ vim ဖြစ်စေ မိမိစိတ်ကြိုက် text editor ဖြင့် ပြင်ဆင်နိုင်ပါသည်။
ထိုအဆင့်တွင် ပြင်ရန် အပိုင်း နှစ်ပိုင်းရှိပါသည်။
Global Setting နဲ့ Share definitions ဖြစ်ပါသည်။
Global setting သည် တခြား OS တွင် မြင်တွေ့စေချင်သည့် ပုံစံကို ပြင်ဆင်နိုင်ပါသည်။
ဥပမာ Net BIOS name ကို yes ပေးထားလျှင် IP ဖြင့်သာမက Host Name ဖြင့် ခေါ်၍ရပါသည်။ ပိတ်ထားလျှင် IP ဖြင့်သာ ခေါ်နိုင်ပါမည်။
ထို့နောက် Workgroup ကို ပြင်ဆင်ပါမည်။
Share definitions မှာ မိမိ share ပေးမည် path လမ်းကြောင်း ၊ user permission ၊ browsable တို့ကို ပြင်ပေးရသည့် အပိုင်းဖြစ်ပါသည် ။
ယခု သင်ခန်းစာမှာက user တစ်ဦးချင်းဆီ access လုပ်ခွင့်ကို မပြောတော့ပဲ Default file sharing ကိုသာ ပြောပါမည်။
အလွန် လွယ်ပါသည် copy and paste လုပ်ကြပါမည်။
lines တွေရှေ့က # လေး ဖြုတ်လျှင် enable ဖြစ်ပြီး ပိတ်ထားလျှင်တော့ comment သာဖြစ်ပါမည်။
ကျွန်တော်ကတော့ အောက်ဆုံးမှာပဲ သီးသန့် ရေးပြင်ပါသည်။
[global] workgroup = WORKGROUP server string = Samba Server %v netbios name = ubuntu security = user dns proxy = no
[Anonymous] path = /home/ubuntu/anonymous browsable =yes writable = yes guest ok = yes read only = no force user = nobody
share ပေးမည့် Folder တစ်ခု တည်ဆောက်ပါ။ ကျွန်တော်က home အောက်မှာ anonymous နာမည်ဖြင့် folder တစ်ခု လုပ်ထားပါသည်။ ကိုယ် share ပေးမည် folder ကို path လမ်းကြောင်းမှာ ညွန်းပေးရမည်။
[] လေးထောင့်ကွင်းထဲက share name ဖြစ်ပါသည်။ တဖက်က လှမ်းခေါ်ရင် မြင်ရမည့် Folder Name ဖြစ်ပါသည်။ အခု အတိုင်းဆိုပါက ကြည့်ခွင့်၊ ရေးခွင့် ပေးထားပါသည်။ ဒါကတော့ ကိုယ်ကြိုက်သလိုပေးနိုင်ပါသည်။
ကဲ အခု folder တည်ဆောက်မယ် ။
sudo mkdir -p anonymous
folder ကို permission ပေးမည် ။
sudo chmod -R 775 anonymous
ပြီးလျှင် owner ပြောင်းမည်။
sudo chown -R nobody:nogroup anonymous
ဒါကတော့ ဘယ်သူမဆို ဝင်ရေးရအောင် လုပ်ထားခြင်း ဖြစ်ပါသည်။
ဒါဆိုရင် configuration ပြီးပါပြီ။
samba server ကို restart လုပ်ပါ
sudo service smbd restart ဟု ရိုက်လိုက်ပါ။
samba server အခြေအနေကို ကြည့်ချင်ရင်
sudo smbd status ဟုရိုက်ပါ။
Windows OS ဘက်နေ ခေါ်ကြည့်ပါ။ (WRITE) ရေးလို့လည်းရ (READ) ကူးလိုလည်း ရပါသည်။ user တွေ တည်ဆောက်ပြီး တစ်ယောက်ချင်းဆီ permission လုပ်လို့ရပါသည်။
ကိုစိုးဝင်း
Email: iphonehelpdesk.mm@gmail.com
Related posts


Ubuntu သွက်လက် မြန်ဆန်စေမည့် နည်းလမ်းများ
ask.ubuntu mm.net မှ မေးခွန်းကို ဖြေကြားထားခြင်းဖြစ်ပါသည်။ Swap ကို ပြင်ဆင်ပါ။ ဖိုင်ထဲတွင် vm.swappiness ကို ရှာကာ 10 ဟု ပြောင်းပါ။ အသေးစိတ်…
 Ko Ko Ye
2 min read
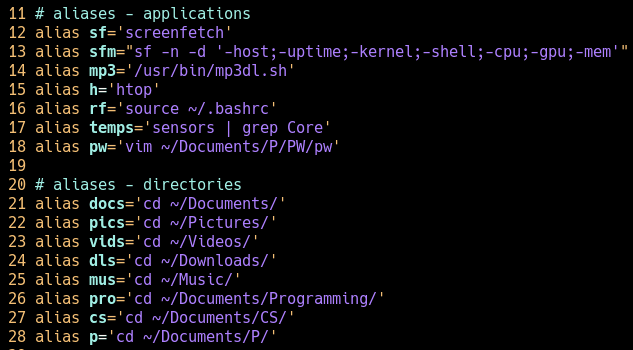
Alias On Ubuntu
Ubuntu users တွေအတွက် Terminal သုံးတဲ့အခါမှာ အချိန် ကုန်သက်သာစေမယ့် နည်းလမ်းကောင်းတစ်ခုပေးချင်ပါတယ်။ terminal မှာ alias သုံးနည်းလေးဘဲဖြစ်ပါတယ်။ ကိုယ် ရေးနေကြ command အရှည်ကြီးတွေ…
Ko Ko Ye1 min read